How to Automatically Translate a WordPress Website

[ad_1]
Looking for ways to implement automatic translation in WordPress?
Translating a WordPress website into more languages will help you draw more traffic and generate more revenue. But translation is a labor-intensive task and it could take you days or weeks to translate your website into multiple languages.
To get your website translated faster and with minimal effort, you can implement automatic translation on your WordPress website.
In this article, we will show you the exact steps you need to take to automatically translate a WordPress website into a different language.
Without further ado, let’s dive in.
Benefits of Automatic Translations in WordPress
Automatic translation of a WordPress site offers 3 major benefits over manual translation. Those are:
- Automatic translation can quickly translate large amounts of content, saving you a lot of time and effort;
- This type of translation eliminates the need to hire professional translators, reducing translation costs significantly;
- It ensures consistent terminology and language used throughout the website, reducing the risk of irregularities that can occur with manual translation.
However, it’s important to note that automatic translation may not always provide the same level of accuracy and linguistic quality as manual translation, especially for complex or nuanced content.
That said, it shouldn’t discourage you from adding automatic translations to your website because there are ways to ensure 100% (or nearly 100%) accuracy via regular review and manual modification. More on that in the next section.
How to Automatically Translate a WordPress Site?
To implement automatic translation on your WordPress website, you need to take the following steps:
In the next few sections, we are going to take a deep dive into each of these steps and show you how to carry them out on your WordPress site.
Quick side note: The same steps below would work if you are looking to automatically translate a WooCommerce store.
1. Install a Translation Plugin
There are several translation plugins to choose from but one of the most popular and definitely the most user-friendly tool is TranslatePress.
Let’s take a look at what makes the plugin one of the most sought-after translation plugins for WordPress websites:
- It supports 220+ languages;
- Allows both manual and automatic translations;
- Uses best translation engines (DeepL & Google Translate) for automatic translation;
- Live preview of your translated pages, during manual translations;
- Translates SEO elements like image alt text, page slug, page title, and meta description;
- Translates content added by WordPress, plugins, and themes;
- Offers multiple translator accounts;
- Offers language switchers;
- Supports WooCommerce stores and sites built with Elementor or other page builders.
On top of all these, the plugin is extremely easy to use. You will learn just how user-friendly TranslatePress is in the next section when enabling automatic translations.
For now, download the free TranslatePress automatic translation plugin and install it on your WordPress website.
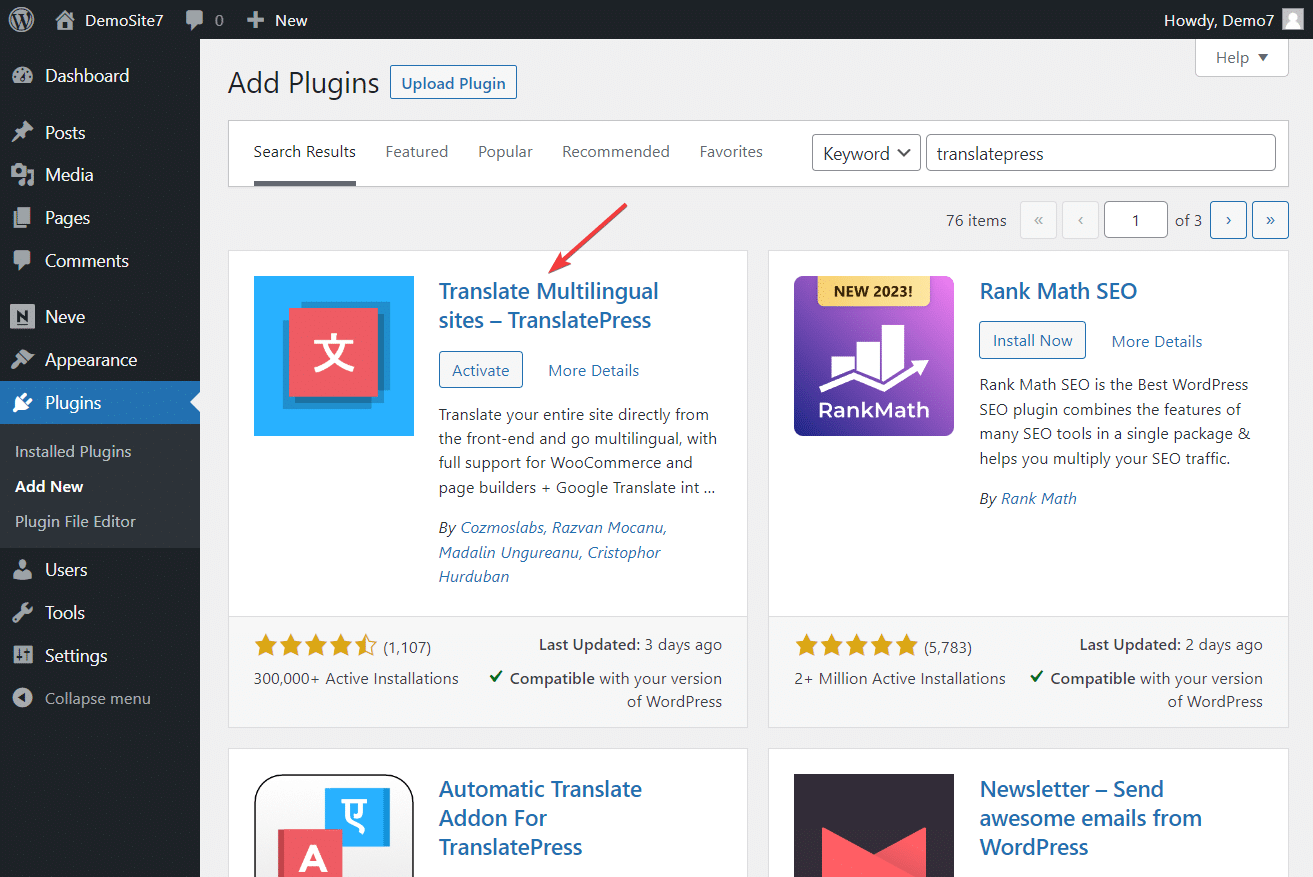
Open your WordPress dashboard and go to Plugins > Add New and upload and activate the plugin. Alternatively, you can go to Plugins > Add New and insert “TranslatePress” into the search box. Then proceed to install and activate the plugin on your WordPress website.
IMPORTANT: Although you can use the free version of the plugin to follow this tutorial, you will need the premium version to access features like adding multiple languages, using the DeepL translation engine, translating SEO elements, adding multiple “translator” user accounts, etc. To learn more about the TranslatePress Pro plugin and to figure out whether you need the premium version of the plugin, take a look at this article: TranslatePress Free vs Pro.
2. Enable Automatic Translation
To enable automatic translations using TranslatePress, you need to take the following steps:
i. Select a Second Language
The second language refers to the language in which you want to translate your WordPress website. Here’s how you can select the second language:
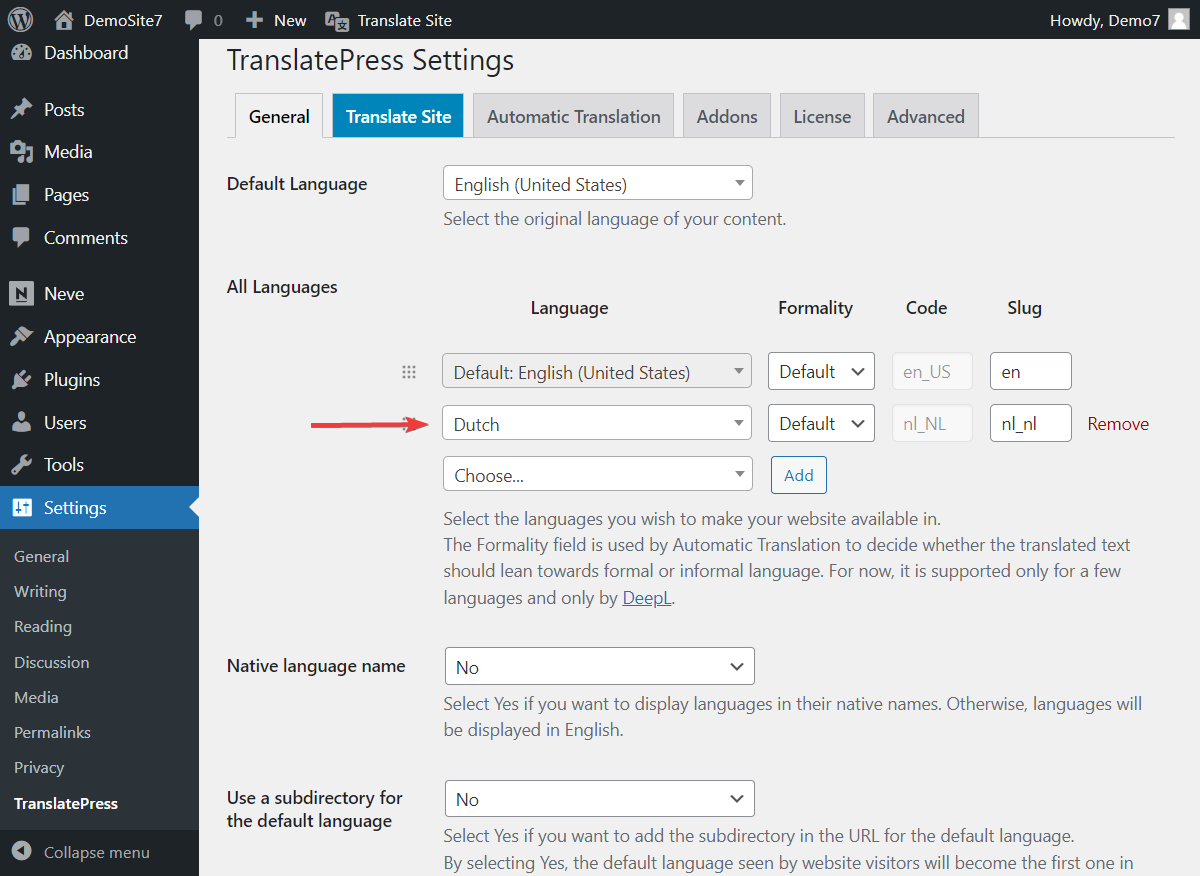
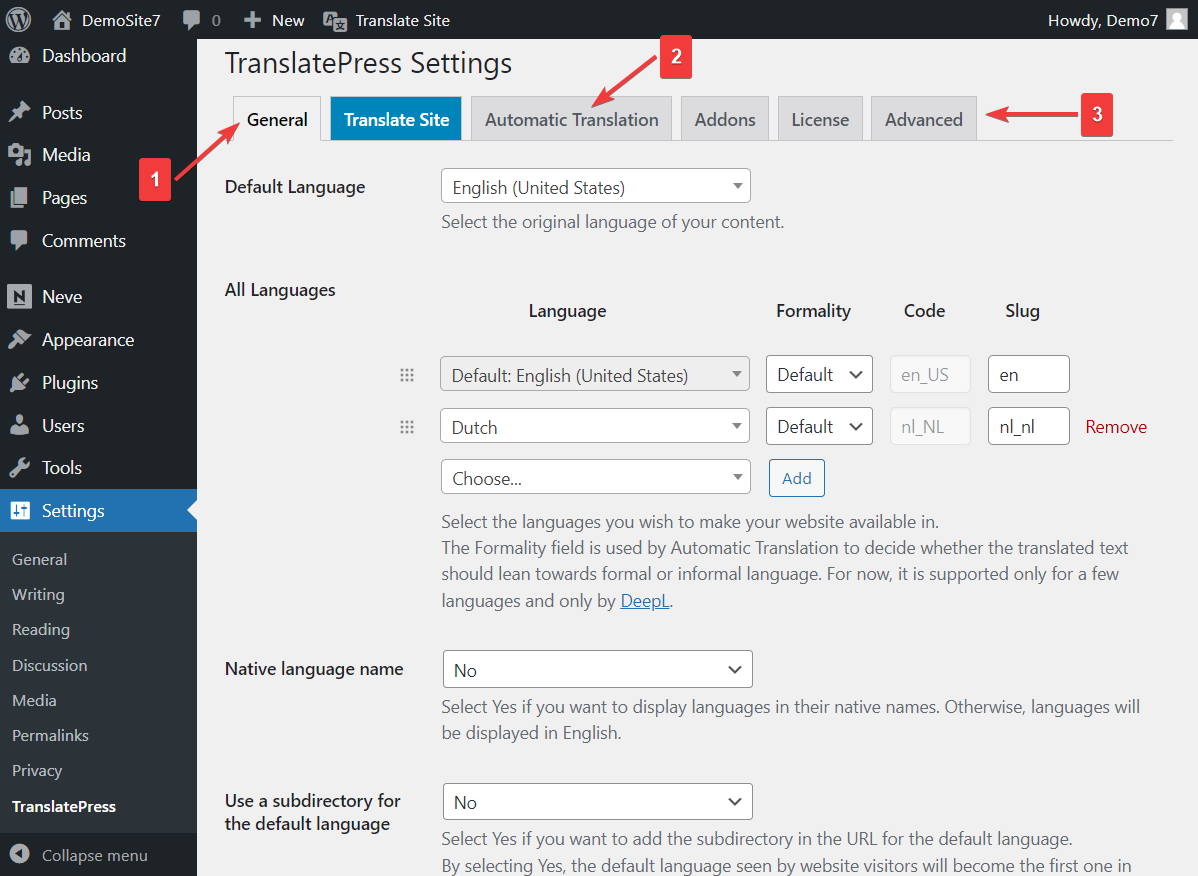
Open your WordPress site and go to Settings > TranslatePress > General > All Languages.
From the dropdown menu, select a second language of your choice and hit the Add button.
Keep the formality, code, and slug options as they are. And be sure to hit the Save Changes button before moving to the next step.
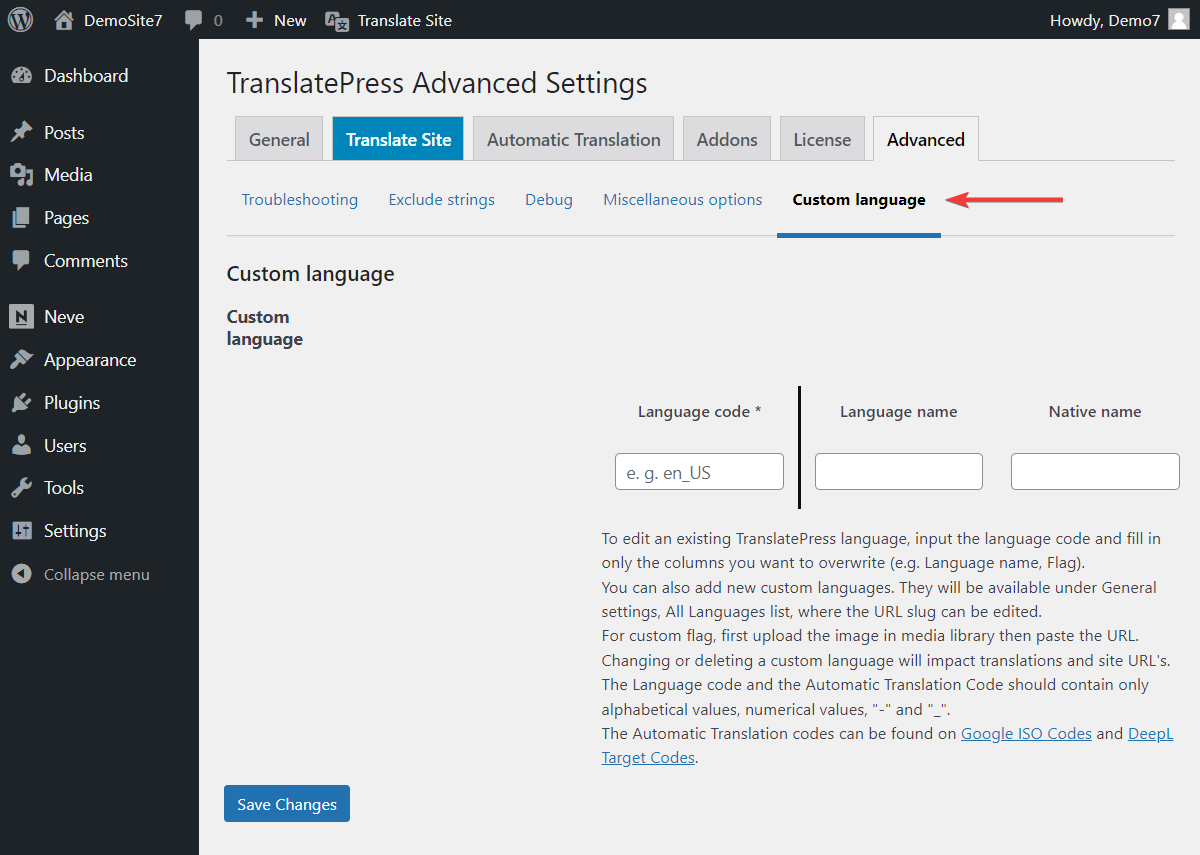
Also, if you can’t find the language of your choice, add a custom language by navigating to Settings > TranslatePress > Advanced > Custom Language.
ii. Enable Automatic Translation
To enable automatic translation in WordPress, go to Settings > TranslatePress > Automatic Translation, and from under the Enable Automatic Translation option select Yes.
Then, hit the Save Changes button before proceeding with the next step.

iii. Add a Translation Engine
Translation engines are translation services that use artificial intelligence to provide high-quality and accurate translations.
Google Translate and DeepL are the two most effective and well–known translation engines out there. Since there is no direct way to integrate these services into a WordPress website, you require the help of a translation plugin like TranslatePress.
Using the TranslatePress Automatic Translation plugin, you can access Google Translate free of cost but to use DeepL you need to upgrade to the premium version of the plugin.
Since we are using the free plugin to demonstrate in this tutorial so we will continue on that path and show you how to use Google Translate to automate translations.
Quick side note: Before proceeding to set up Google Translate, please bear in mind that the tool has a limitation. You can translate up to 500,000 characters for free per month. To use the service beyond that, you will need to pay a charge directly to Google. Learn more about Google Translation pricing from here.
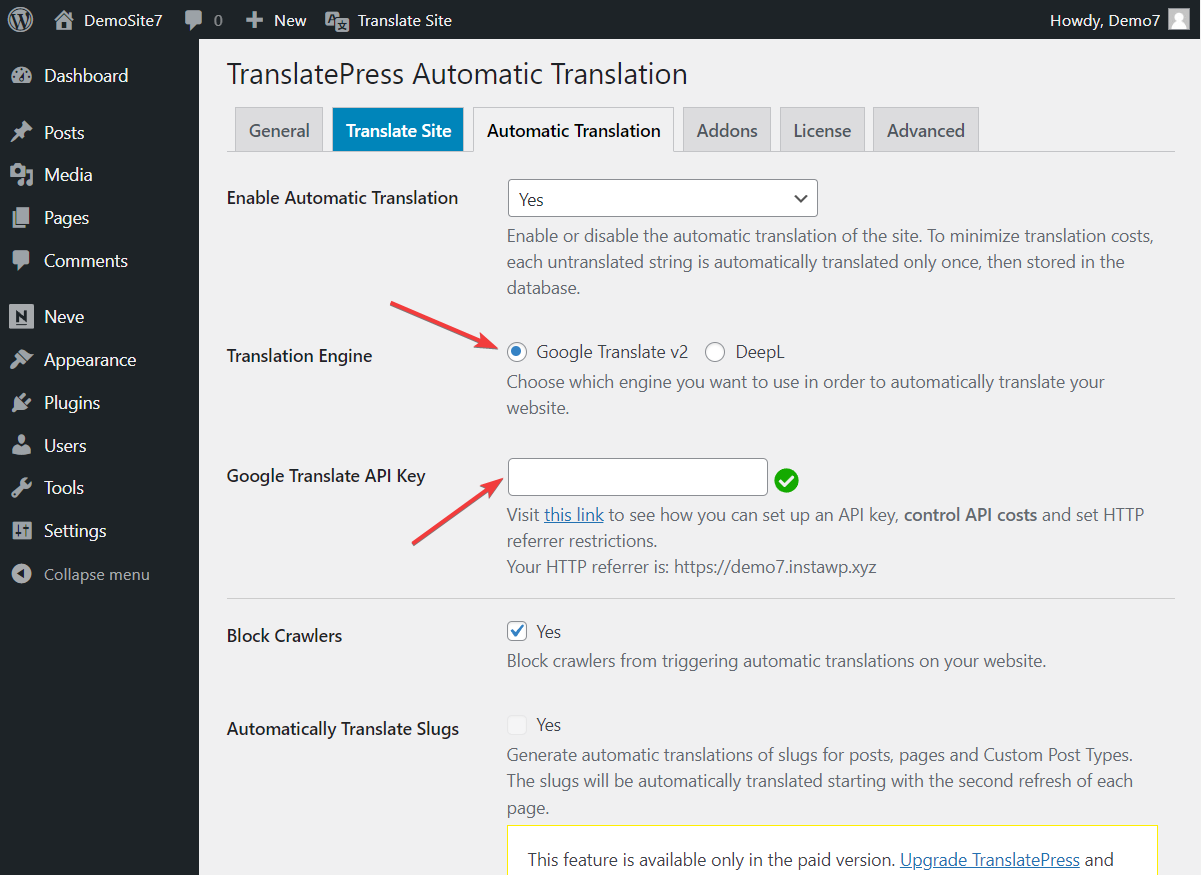
To use Google Translate via TranslatePress, you need to select the Google Translate v2 option under Translation Engine (shown in the image below).
Next, generate an API key and insert it under the Google Translation API key option.
Hit the Save Changes button to save your configurations.
You have now completed enabling the TranslatePress automatic translation feature on your WordPress website.
Now your site will be automatically translated upon the first visit on each page in the newly added language. All you have to do is visit the site from the front end, switch to your secondary language from the language switcher, and Google Translate will automatically translate it.
This only happens upon the first visit, and then the translation is stored in your own database. This means that your site won’t need to fetch the translation from Google Translate with each visit, only the first time.
iv. Review TranslatePress Settings (Optional)
When you visit your website from the front end, you will notice a language switcher that allows you to manually switch between your site’s default and the second language.

You can change the color, location, and other design aspects of the language switcher from TranslatePress’ General settings page.
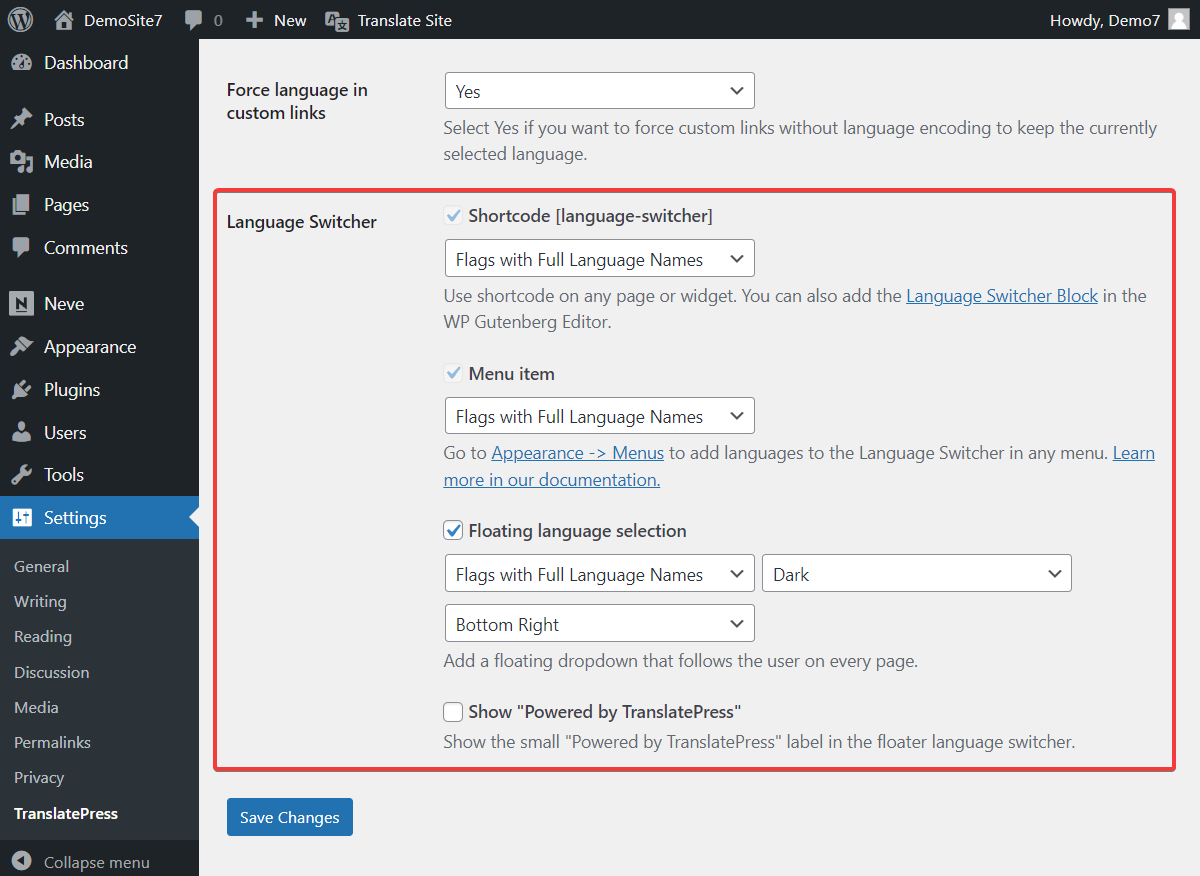
You can make a lot more modifications from the General, Automatic Translation, and Advanced Setting pages. We recommend taking a look at all the options on these pages and making modifications that you feel are necessary for your website.
3. Manually Modify Content
We mentioned earlier how automatic translations are not error proof but there are ways to ensure nearly 100% accuracy by reviewing your site’s pages and manually modifying inaccurate translations.
For websites with a lot of content, we recommend picking the most important pages and then reviewing the translated versions carefully.
To modify a translated text, these are the steps you need to take:
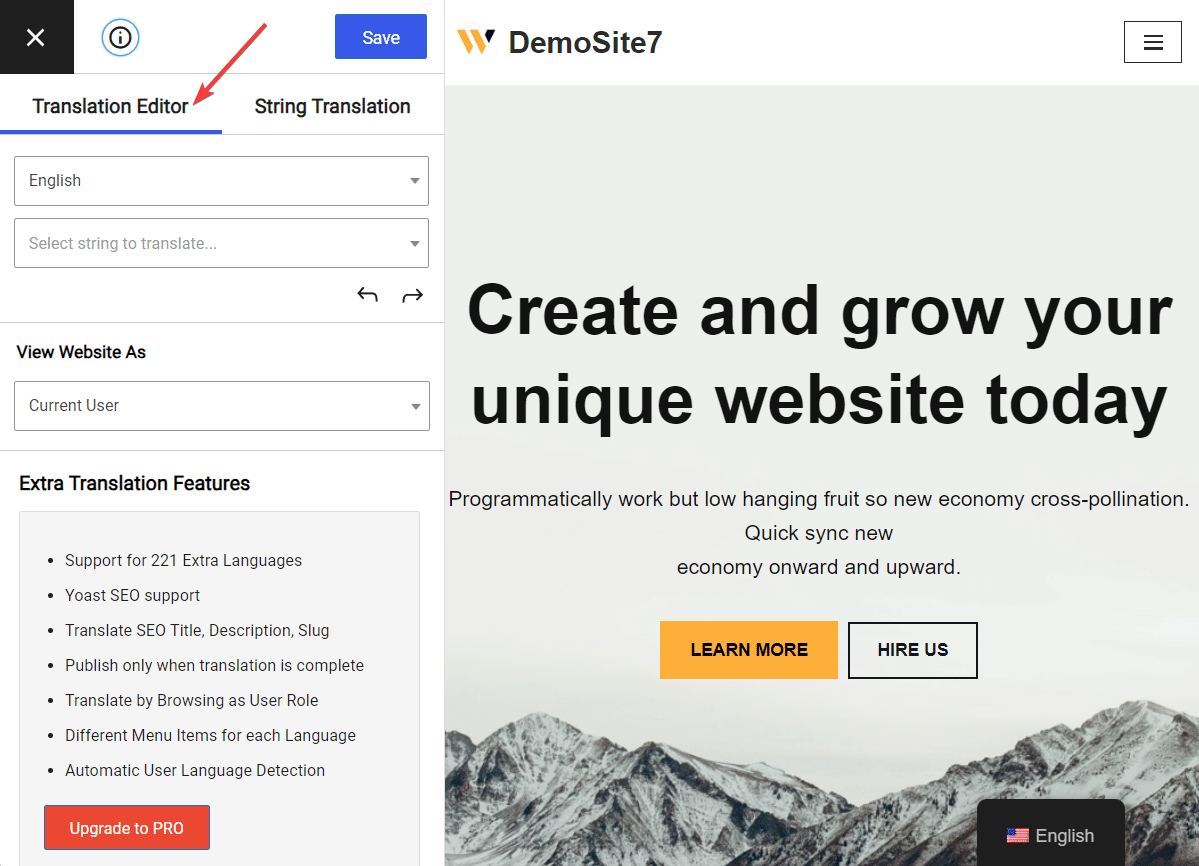
Open the page you want to modify. Select the Translate Page option from the admin bar.

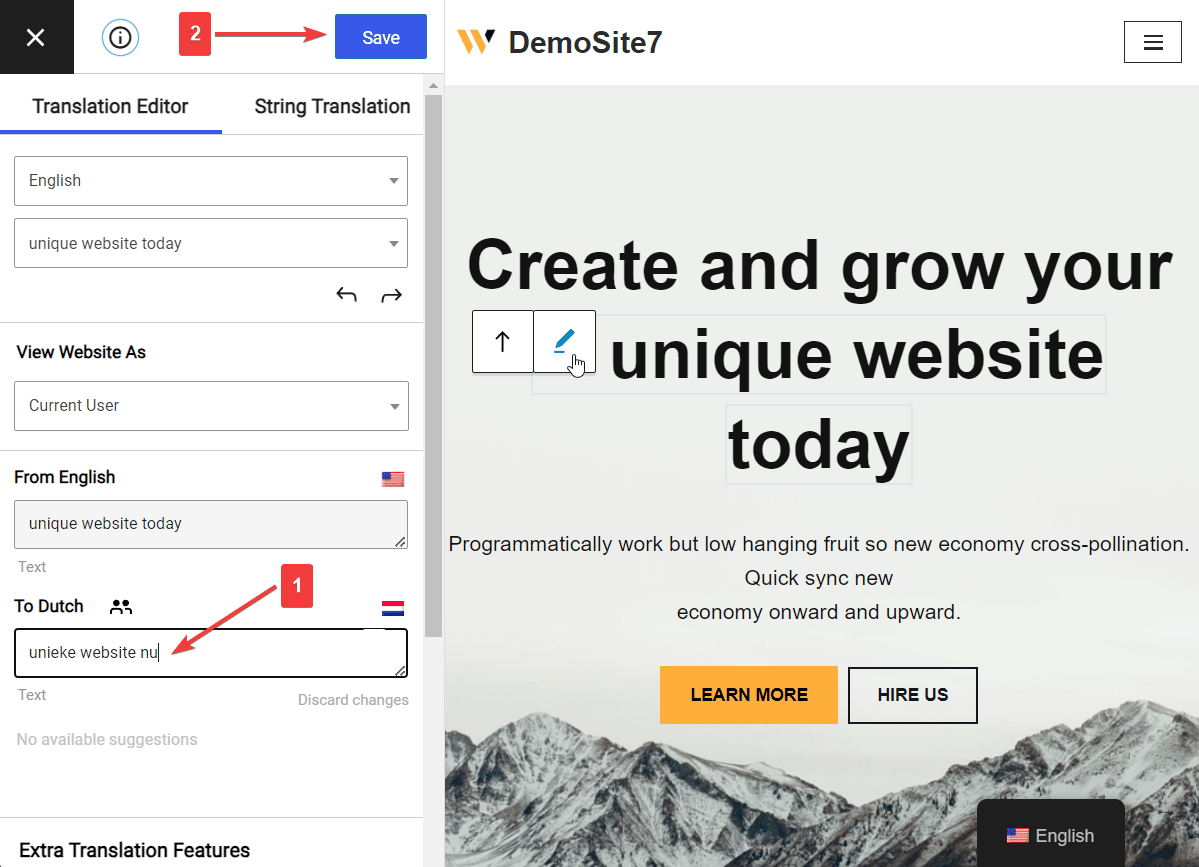
As soon as you do that, a tool called the Translation Editor will appear on the left side of the screen. This tool will help you modify inaccurate translations.
Hover your cursor over the text you want to modify on the page. A blue pen will appear next to that text. Select that pen, and the text will appear in the translation editor, ready for modification.
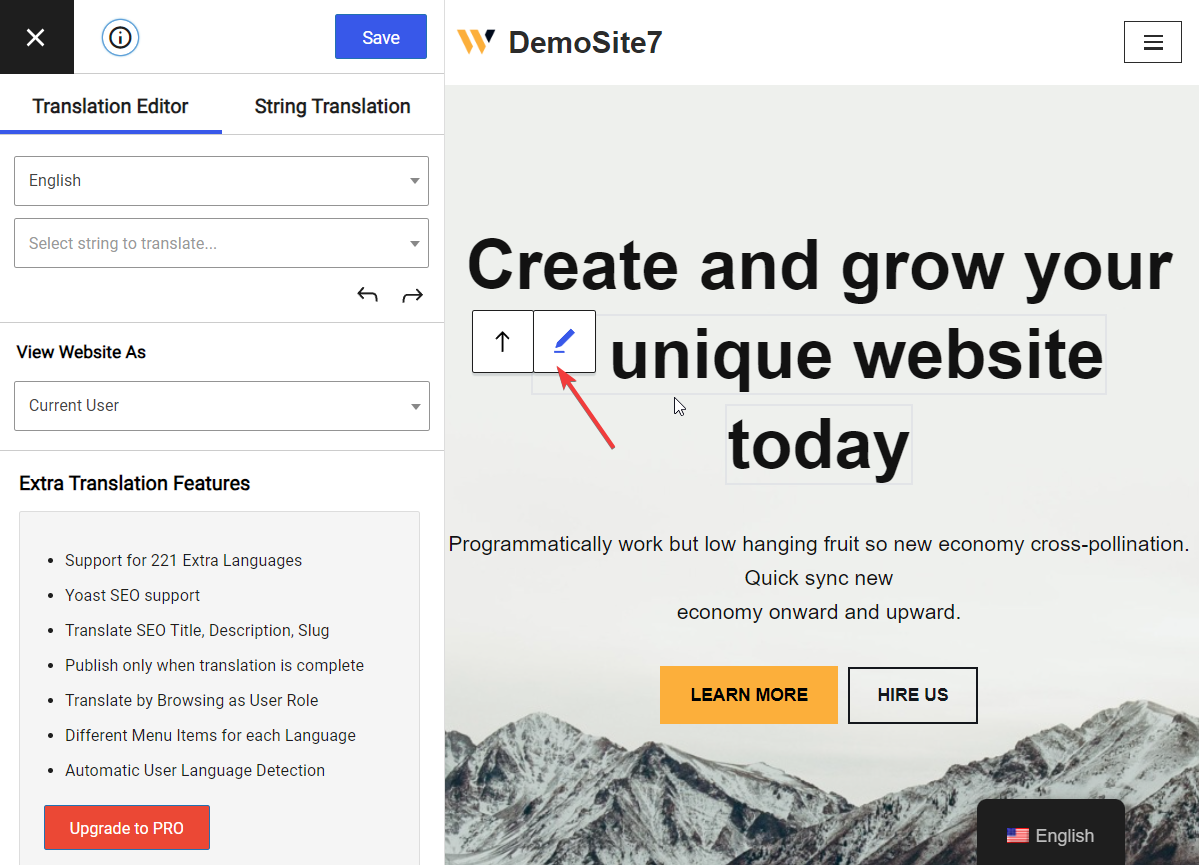
Now, all you need to do is replace the text with a more accurate translation and hit the Save button located at the top of the editor.
And that’s how you manually modify automatically translated texts.
Going forward, whenever you come across translation inaccuracies, open the Translation Editor, select the text, and replace it with an accurate version. That’s the long and short of it.
Conclusion
Automatically translating a WordPress website is not a difficult task if you have the right tools to aid you.
While there are many WordPress auto-translate plugins, TranslatePress is the most user-friendly choice.
It’s a free and easy-to-use plugin that requires zero technical skills to implement automatic translations on your WordPress site. All you need to do is:
- Install the plugin;
- Select a second language;
- Enable the automatic translation feature;
- Add a translation engine of your choice;
- Manually modify translated content if required.
Next, if you want to take this even further and translate SEO elements or even add more languages to your site, you can upgrade to the pro version of TranslatePress.
With that, we have come to the end of this tutorial. If you have any questions about how to automatically translate a WordPress website, let us know in the comments below.
Was this article helpful?
YesNo
[ad_2]
Source link